

Your guide to mixing Desert Shadow hair colours in brown tones.
This mixing guide is suitable for grey coverage using
Caramel Shadow, Chestnut Shadow, Deep Chestnut Shadow, Honey Shadow
Walnut Shadow and Chocolate Shadow
Mixing your organic hair colour is similar to baking a cake or making pancakes.
You add liquid to a powder, mix and it is ready. You have a recipe in your instruction leaflet and we suggest you follow this until you get acquainted and build a bit of a relationship with the product. Once you have used it a few times you can start to adjust the recipe to make it your own or you can just leave it as it is...... your hair your choice.
Here we have some tips for your mixing pleasure.
The topics we cover in this blog post will be:
1. How much product to mix for your hair length
2. Splitting a pack of colour
3. Liquids & mixing the 2 steps
4. Optional extras
5.Timing
6. Clever tips
7. Do’s & don’ts
*please be sure to use this guide along with your instructions and make sure you read the instructions in full before proceeding with the mixing.
1. How much product should you mix?
Short hair & root touch ups - 1/2 pack
Medium hair - 1 pack
Long hair - 1 to 1.5 packs
Super long hair - 2 - 3 packs
Thick hair - will need to add an extra 1/4 pack for short hair and 1/2 (short to medium) to 3/4 pack (for long hair)
If you are unsure email us with a picture of your hair and we will help guide you.
*Please note - repeated use will see your colour become richer and in some cases darker. Once you achieve the colour shade you like, simply apply to the roots only and do a full application every 4th or 5th time to boost the colour at the ends. This will save time and product.
2. Splitting a pack of colour
If you wish to have multiple treatments from 1 pack of hair colour you will need to evenly split both the step 1 and step 2 evenly to get the correct colour. You can do this by weighing each sachet with digital scales and then splitting it into equal portions.
Each colour will have different weight for the step 1 and step 2. This is why you need to weigh each pack and then divide equally. If you do not do this you will get a different colour result.
example 1 - to split a Chocolate Shadow into 2 colour treatments
First weigh the 2 packs
step 1 = 40g and step 2 = 60g
Divide each sachet in equal halves ( Step 1 = 20g and step 2 = 30g ). This will give me the equivalent to half a box ( 50g )
Use one half of each now, mix as per instructions and seal up the other portions for next time.
example 2 - to split Chestnut Shadow into 2 colour treatments
First weigh the 2 packs
step 1 = 50g and step 2 = 50g
Divide each sachet in equal amounts ( step 1 = 25g and step 2 = 25g ). This will give me the equivalent to half a box ( 50g )
Use one half of each now, mix as per instructions and seal up the other portions for next time.
*Please note you will need to adjust your liquid measurements to match.
3. Liquid & mixing the 2 steps
Here you can find our full mixing video for grey coverage which may be helpful
Step 1
We recommend you use Apple Cider vinegar and warm water with a dilution ratio of 30% ACV to 70% H2O
( for 100ml you will use 30 ml of ACV + 70ml of warm H2O )
When we say warm water we mean a temperature that is like a warm bath. Not hot! hot and boiling water can ruin the colouring properties of the product.
If you do not have Apple cider vinegar you can also use any of these :
- Diluted Lemon juice - 30% Lemon to 70% H2O ( do not use this if you have sensitive skin as the lemon may cause irritation) for 100ml you will use 30 ml of Lemon + 70ml of warm H2O
- Black tea - Make a brew same as you would make a cup of tea
Prepare your mix as per instructions 6 to 12 hours before you wish to colour your hair.
You can also use herbal tea instead of water for the step 1 if you would like the added benefits they bring. Simply make a tea with the required amount of water and allow to steep. Use this in place of water and add your ACV with the dilution ratio of 30% ACV + 70% water.
Some examples of teas that are good for the hair:
CHAMOMILE TEA : is soothing for the scalp and smells nice
ROSEMARY TEA: promotes healthy hair growth
TIP: if you mix your step 1 and then decide not to colour your hair you can save this mix for later. Simply go through the activation process and then freeze the mix. The step 1 will preserve for a couple of months when frozen. When you do use the colour, defrost the paste naturally - DO NOT heat it up! This will ruin the colouring properties
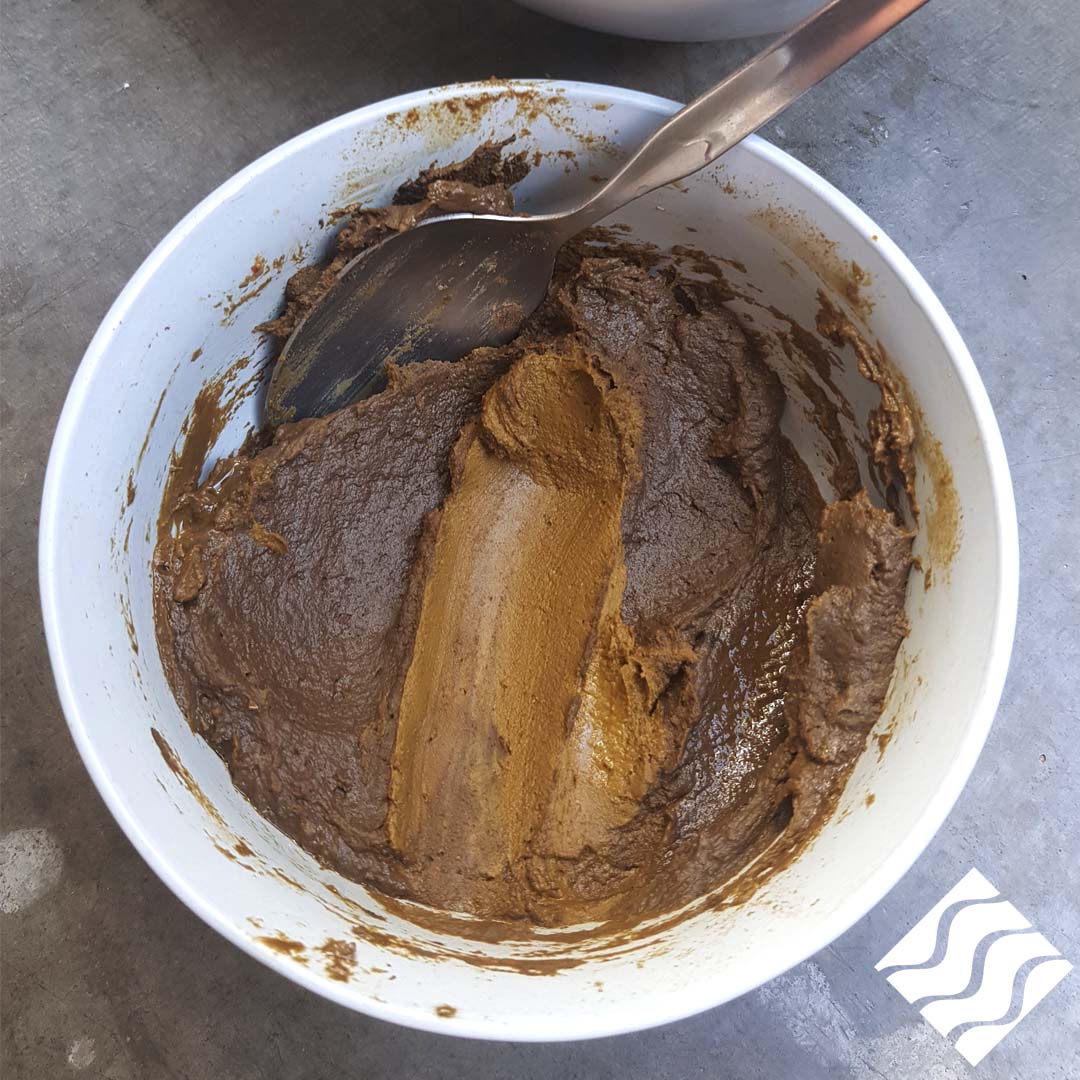
Here is an example picture of the step 1 after 8 hours of activation. You can see that the paste has formed a darker, oxidised layer on the top and underneath the paste has become a light brown colour. This colour change is a sign that the step 1 mix is ready to combine with the step 2. At this stage you may need to add a little more water to get the right consistency
*This is the stage where you can use or freeze the mix
Step 2
We recommend you use warm water only because the step 2 ingredients are a little bit temperamental and like water the best. Make sure you add the salt at the same time as you add the water.
Again, when we say warm water we mean a temperature that is like a warm bath. Not hot! hot and boiling water can ruin the colouring properties of the product.
Prepare your step 2 mix 15 mins before you wish to colour your hair.
TIP: Once activated with water, your step 2 must be used. It will not keep like the step 1 and after 6 hours will lose its colouring power. Only mix the step 2 if you are going to use the product straight away.
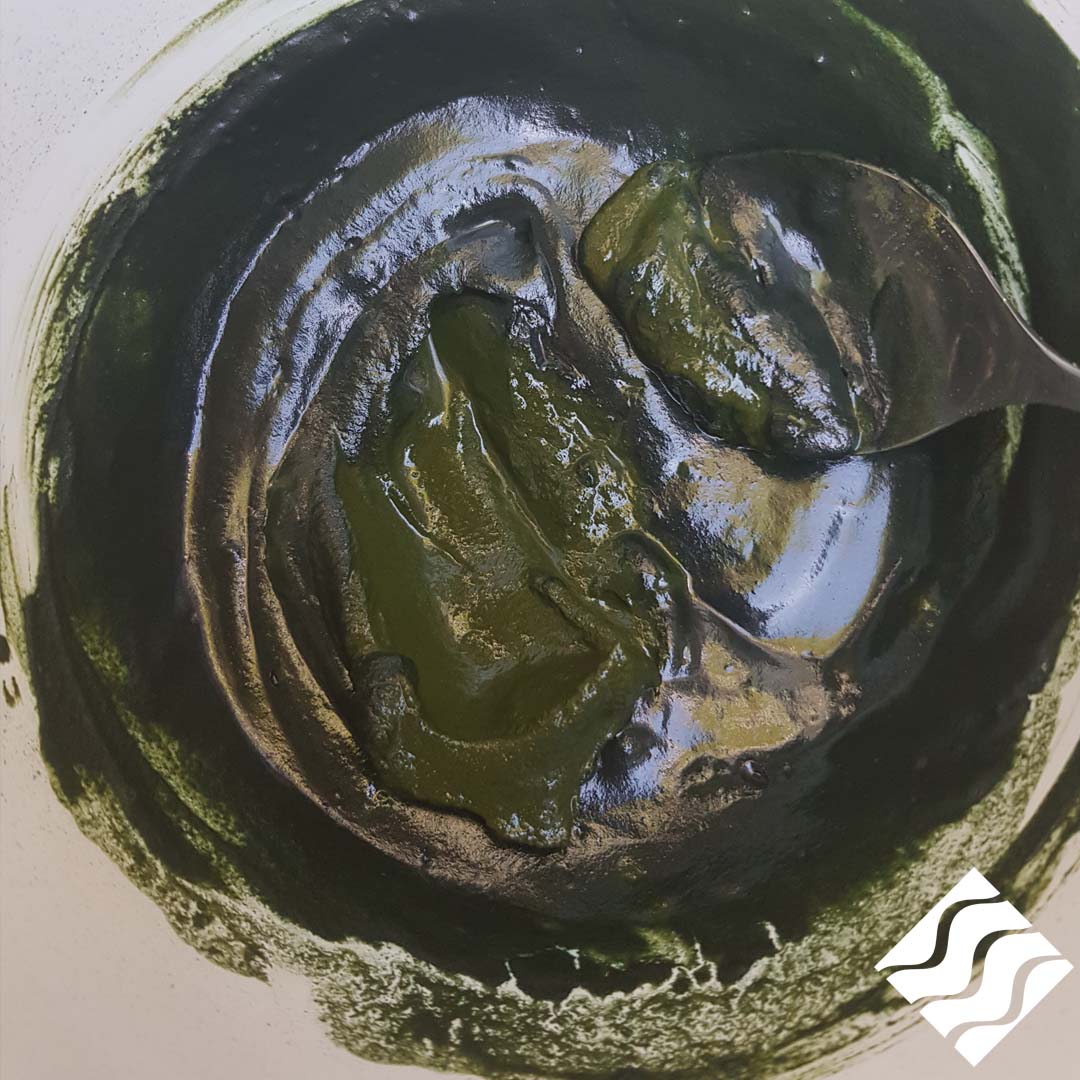
Here is an example picture of the step 2 after 15 mins of activation. You can see the paste has formed a dark blue layer on the top and underneath the paste remains a green colour. This colour change is a sign that the step 2 mix is ready to combine with the step 1
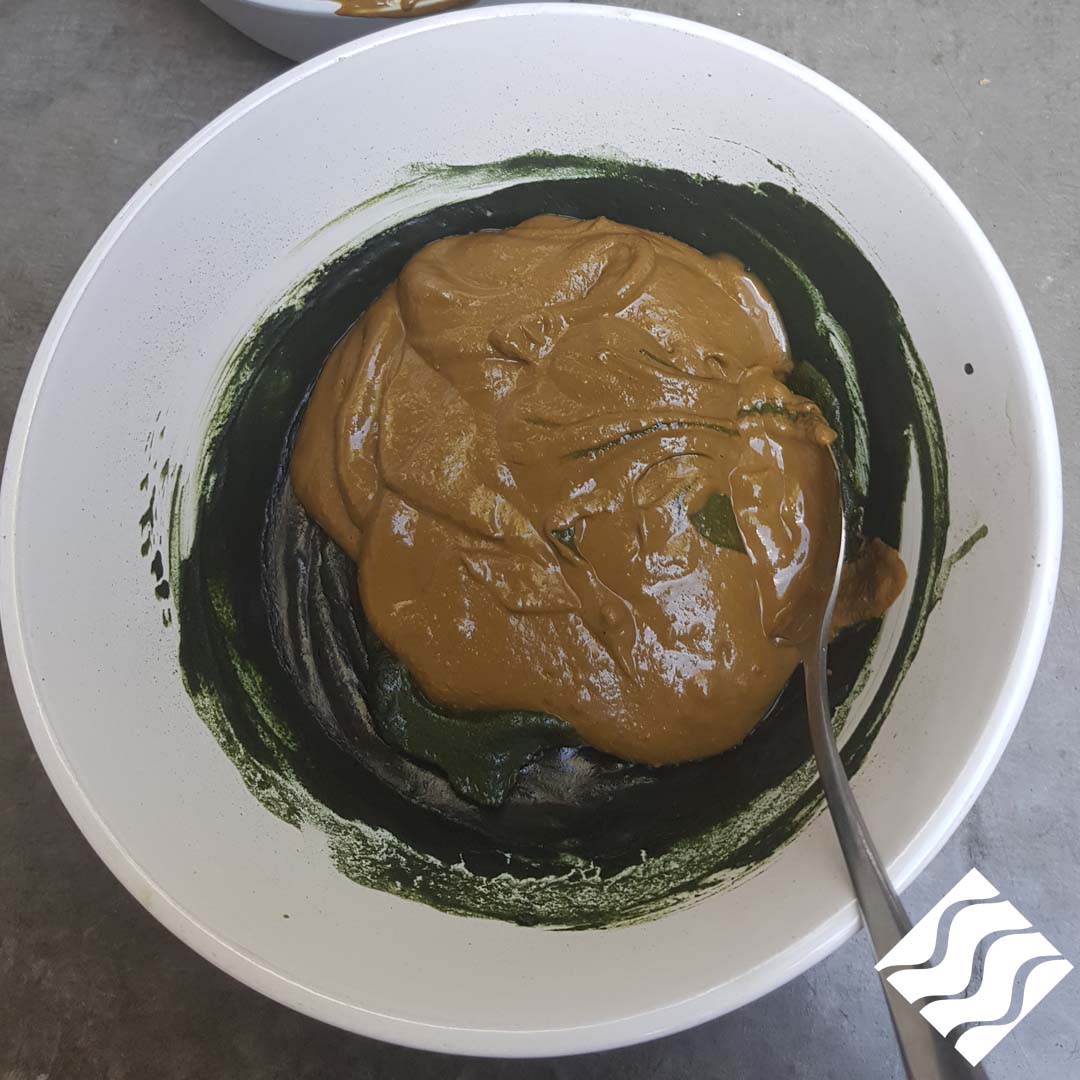
Adding the step 1 & step 2 together
Combine your step 1 and 2 together in a bowl. You may need to add extra liquid to the step 1 to get a yoghurt type consistency before mixing with the step 2. You can see the colours of the 2 mixes are very different which makes gives a visual when they are both combined well.
4. Optional Extras
If you are interested in essential oils you can also add 1 to 2 drops to your colour mix. We suggest you check for any contraindications before using essential oils and use them sparingly as they are very potent. Do not use essential oils if you are pregnant or breastfeeding unless you see a healthcare professional first.
Some examples of essential oils that are beneficial for the hair:
Lavender Angustifolia
Rosemary
Geranium
Sandalwood
Peppermint
*Please note add the essential oils after combining the step 1 and 2 together
5. Timing
Mixing:
Mix your Step 1 6 to 12 hours before you intend to use the colour
Mix your Step 2 15 mins before you intend to use the colour.
Activation: Once you have combined the step 1 & step 2 together you can leave your paste to sit for 10 mins before applying. This product can be left for longer if you wish but it must be covered so that it doesn't dry out. Once the Red Shades are activated with liquids they must be used within 8 to 12 hours. After this time the dye content will start to reduce and the colour result will not be as strong.
STEP 1 TIP: If you mix your step 1 and then decide you want to apply the colour at another time. Simply complete the activation process and then pop your paste into the freezer. It will freeze for up to 3 months and retain its full colour integrity. When you wish to use allow the paste to thaw out naturally DO NOT MICROWAVE OR HEAT IT UP.
STEP 2 TIP: Only mix the step 2 when you are ready to apply the colour. Once activated step 2 must be used and will not save
Colour processing:
GREY COVERAGE - leave the paste in your hair for 3 hours minimum.
TIP: after 5 to 6 hours the organic hair colour will have reached it's limit and there is no extra benefit of leaving it on for this long unless it is for convenience, like if you sleep with it on overnight. 4 hours would be the absolute maximum needed.
For more tips on colouring grey hair please see our Guide to colouring grey hair article
6. Clever Tips
- Mix your colour in a non porous bowl. You can use stainless steel, ceramic or plastic. The colour may stain light coloured plastic or porous ceramic.
- If your mix is lumpy even after giving it a good mix, get your electric beaters out and whizz it up for a minute or two. That should get most of them out.
- Repeated use will see your colour become richer and in some cases darker. Once you achieve the colour shade you like, simply apply to the roots only and do a full application every 4th or 5th time to boost the colour at the ends. This will save time and product.
- Left over colour? Only the step 1 can be frozen and saved for another time. Once the Step 2 is activated with water it must be used. Best to split your colour ( see point 2 above ) if you are certain you will have left overs. For first time users mix the whole pack and then you can judge how much you will need for future applications. It is better to have too much than not enough for the first application.
- If you are a messy chef, cover your bench or surfaces with an old towel before getting into your mixing.
- Grey coverage needs a colour processing time of 3hrs in your hair
7. Do's & Dont's
The do's of mixing
- DO wear gloves when mixing
- DO read your instructions in full for measurements & method. If you are unsure read them again.
- DO watch the our you tube video if you are unsure.
- DO dedicate yourself some time for this treatment, you deserve it.
- DO reach out if you have any questions
The dont's of mixing
- DO NOT Microwave your paste
- DO NOT apply direct heat to the paste
- DO NOT use boiling liquids
- DO NOT mix your product until you read your mixing instructions in full.
- DO NOT leave your paste out on the counter for later. Remember, once the Step 2 is activated you must use it.